


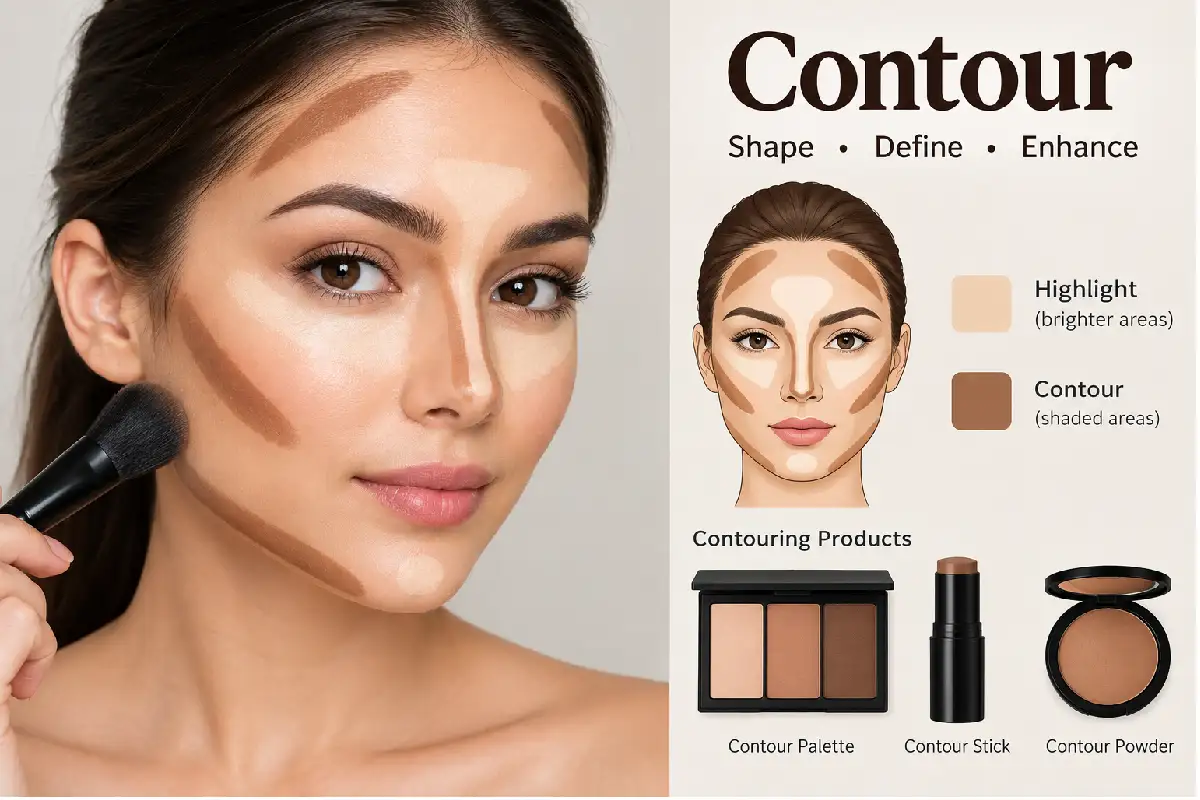
Contour: A Complete Guide to Face Contouring
Last Updated: September 18, 2026
Contour: There is a reason why contouring is one of those makeup tricks that can completely change the finished look. When done correctly and in moderation, contour can add shape to your face, define cheekbones, carve your jawline, and create dimension to your face, and it won’t just look like a bunch of dark lines on your face.
A good rule of thumb for contouring is to avoid putting “streaky dark lines” all over your face, and to instead create natural-looking shadows where the light naturally hits the face. Once you learn where and how to actually apply the contour, you’re sure to find it much easier to master.
1. What Is Contouring?
Contouring is the technique where you use a product that is two or more shades darker than your skin to add shading and dimension to parts of the face that may be a bit flat. This is often the cheeks, forehead, nose, and jawline. It’s different from foundation (which is mainly used to offer a base for the rest of your makeup by evening out skin tone) as it adds dimension to your face to balance out the lighter foundation and make some of your features stand out.
The ‘lighter’ contour shade can be used to really define certain areas by placing the darker one around it – for example, when placed underneath the cheekbones, it can help give the effect of a more sculpted face; a little around your jaw will give it a bit more definition, and it can even be used to shape and structure your nose.
What Does Contour Do?
| Area | Effect of Contouring |
| Cheekbones | Creates a more sculpted appearance |
| Jawline | Adds definition |
| Forehead | Can visually balance a wider forehead |
| Nose | Adds subtle structure |
| Temples | Creates additional facial dimension |
| Under the lower lip | Can add the appearance of depth |
The perfect shape color is neutral or warm, or even cool-tinted on the cool side, because naturally a shadow isn’t typically orange or even yellow-gold. The perfect shade will vary according to your skin color and undertones, as well as the finish that you are trying to achieve.
Common sense rule: no matter what colors you choose, the best contour makes a shadow, not a brown patch!
2. Contour vs Bronzer
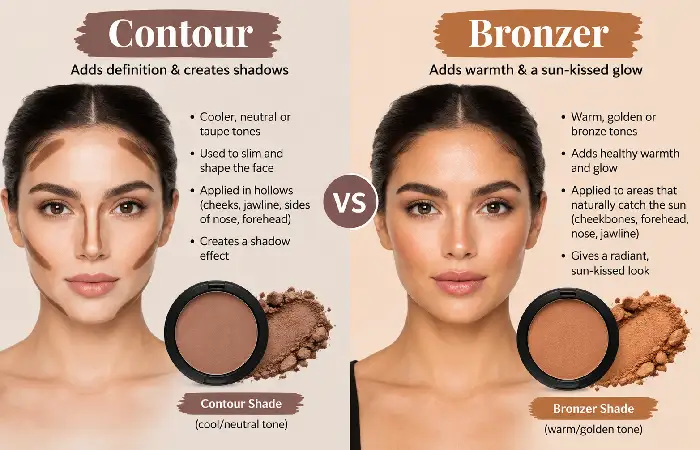
Contouring & Bronzing: Both are pretty similar, so it gets confusing. However, you should know that contour and bronzing are totally different from each other. Bronzer will help you to appear like your face is sun-kissed and you have been out in the sun. Contour is in order to sculpt and thin out the face, but the bulk of the bronzer is honey, golden, or even a little red, while contour is most often a neutral and cool color.
| Feature | Contour | Bronzer |
| Main purpose | Sculpt and define | Add warmth |
| Typical undertone | Neutral/cool | Warm/golden |
| Common placement | Under cheekbones, jaw, nose | Cheeks, forehead, high points |
| Finish | Usually matte | Matte, satin, or luminous |
| Application style | More precise | Usually more diffused |
3. Types of Contour Products
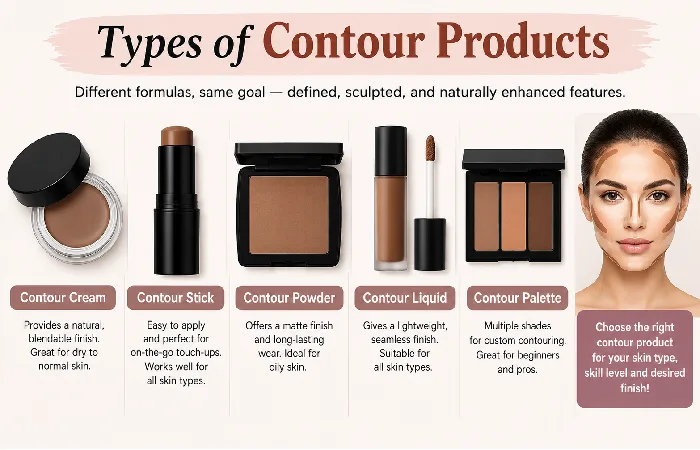
Contour products come in several formulas. Choosing the right one often depends on your skin type, experience level, and the finish you prefer.
Cream Contour
For cream contouring, this one is a few shades lighter, milkier in consistency, and finishes to give the right degree of classic and sculpted makeup.
Cream blush: This cream blush is the perfect finish to a cream foundation; very easy to blend using a brush or sponge. Great for a first-time contour where you can add product and build rather than start heavy.
Powder Contour
Powder contour is easy to control and is particularly useful for people who prefer a matte finish. It works well over set foundation and can be applied with an angled brush or smaller blending brush.
Contour Stick
A contour stick is a solid cream product packaged in a convenient stick format. It allows you to draw directly onto areas of the face before blending.
Contour sticks are handy for travel and quick makeup routines, although applying too much directly from the stick can make blending more difficult.
Liquid Contour
Liquid contour tends to have a thin, fluid texture. It can provide a soft, skin-like finish when applied sparingly and blended well.
| Contour Type | Best For | Finish |
| Cream | Natural and sculpted looks | Skin-like |
| Powder | Beginners and matte looks | Matte |
| Stick | Quick, targeted application | Creamy |
| Liquid | Lightweight makeup | Natural |
4. How to Contour Your Face
Contouring becomes much easier when you work with small amounts of product.
Step 1: Prepare Your Base
Apply your moisturizer, sunscreen for your face (In the morning), and your foundation (or base makeup) and/or other cosmetic makeup. Allow time for it to set into your skin before applying your face makeup.
Step 2: Determine your cheekbones (fish face
Suck in your cheeks or lightly pinch your cheek muscles beneath your cheekbone.
Step 3: Contour the Forehead
If you want to add definition around the forehead, apply a small amount near the hairline. Blend inward carefully so there is no obvious line.
Step 4: Define the Jawline
Apply contour beneath the jawline and blend downward toward the neck. This transition is important because a visible horizontal line can make the contour look artificial.
Step 5: Contour the Nose
Use a small, precise brush for the nose. Apply two very thin lines along the sides of the nose and blend gently.
Less is more here. Heavy nose contour can become noticeable very quickly.
Step 6: Blend Everything
Blending is the step that makes contour from a visible strip of makeup into realistic dimension. Apply with a clean brush or damp makeup sponge and blend the edges to diffuse the application without losing definition.
Build slowly. It is much easier to add another layer than to correct an overly dark contour.
5. Contouring by Face Shape
Not every face needs contour in the same places. Your face shape can help you decide where to concentrate definition.
| Face Shape | Contouring Approach |
| Round | Define beneath cheekbones and around the outer forehead |
| Oval | Use light contouring to enhance natural proportions. |
| Square | Soften the appearance of strong forehead and jaw corners. |
| Heart | Focus around the upper forehead and beneath cheekbones. |
| Long/Oblong | Use subtle contour around the forehead and chin. |
| Diamond | Concentrate softly beneath cheekbones and around selected forehead areas. |
Round Face
Contour is best applied below the cheekbones and around the edges of the forehead. When blending, the color should be swept up instead of pulled down.
Oval Face
You have an overall fairly balanced face shape, so be aware that any contour can quickly appear overdone. Concentrate on highlighting your cheekbones and jawline rather than altering the shape of your face.
Square Face
Square face: Gentle contouring of the edges of the forehead and jawline can give a softer appearance on a square face, so be sure to blend well so the edges remain soft. …
Heart-shaped face
Usually, this type of face is the widest around the forehead and narrow at the chin.
Long Face
With a longer face shape, heavy vertical contouring can make the face appear even longer. Keep the technique soft and consider adding definition horizontally around the forehead and chin instead.
6. Cream vs Powder Contour
They can both give great effects, but the textures of cream and powder contour behave differently. Cream contour provides a more natural, liquid product that looks like skin, while powder contour is more readily buildable and typically has a matte finish. Cream contour is often used before setting powder, but powder contour is applied afterward to the already set face.
| Comparison | Cream Contour | Powder Contour |
| Texture | Smooth and creamy | Dry, lightweight |
| Finish | Natural to satin | Usually matte |
| Best application | Brush or sponge | Brush |
| Buildability | Excellent | Excellent |
| Skin feel | More emollient | Lightweight |
| Best for | Fresh, sculpted looks | Defined, matte looks |
If your makeup often appears dry, using a cream contour can be a good choice for a softer effect. For oily skin or just if you like a matte look, powder contour is less maintenance than cream contour. You can also have both! Use a light amount of cream contour, blend it well, and set the face before using powder.
Final Thoughts
Contour need not be drastic. Done correctly, it is just a way of emphasizing the structure you already have. Your best contour will go unnoticed because the shadows will be natural-looking and invisible to the naked eye.
Pick a shade that looks like a real shadow, use a small amount, and spend time blending out the edges. Whatever type of contour product you use — cream, powder, liquid, or stick — the result should be soft definition, dimensionality, and a finish that reads as skin.